Guides
How to Use Notion for a Wedding Planner: Couples and Day-of Timelines
Learn how to set up Notion for a wedding planner with couples, planning tasks, vendors, budgets, and day-of timelines, plus PDF timelines, vendor sheets, and invoices.
By Sanat Biswal · 2026-11-08 · 5 min read
{/ synced-from-notion — do not edit manually /}
A wedding planner holds two timelines at once.
One stretches over a year or more: the venue, the vendors, the budget, the legal paperwork, the hundred decisions a couple has to make.
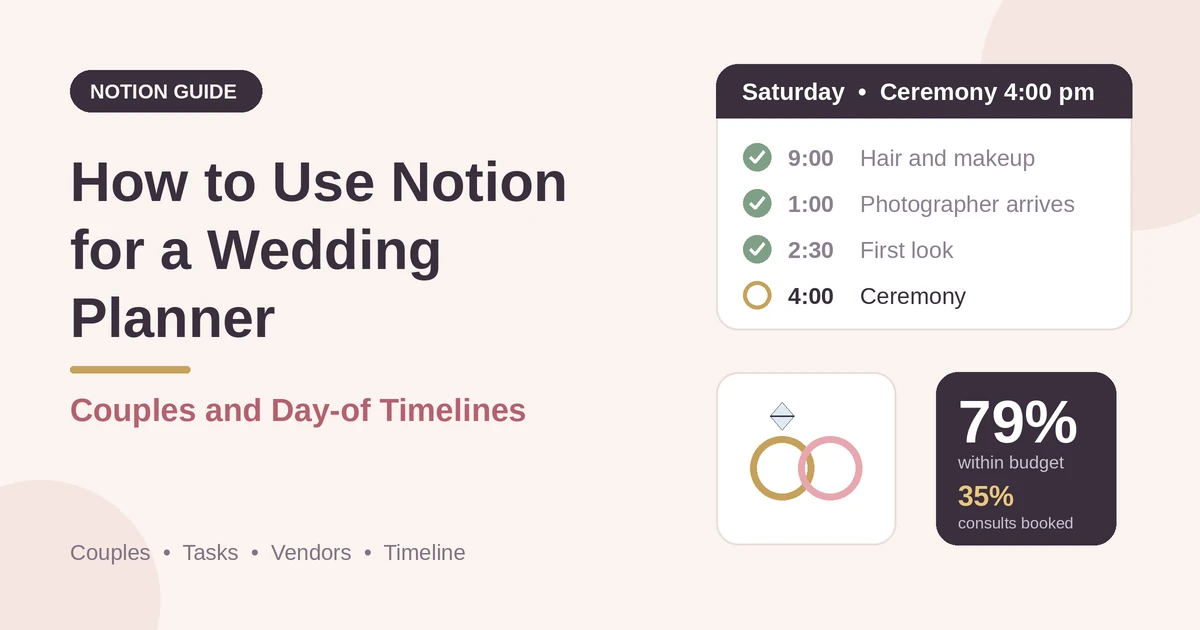
The other fits inside a single day and runs on minutes: hair and makeup at nine, the photographer at one, the ceremony at four, the last dance at a quarter to ten.
Behind both is a person who has to remember what every vendor was promised, what every couple decided, and who’s waiting on whom.
Most planners hold this in spreadsheets, email threads, a notes app, and a binder, and the cost shows up as missed deadlines, vendor mix-ups, and a Saturday where everything depends on one person’s memory.
Notion can hold both timelines in one place.
This guide is for independent wedding planners, coordinators, and small planning studios. It follows a couple from the first consultation to the thank-you notes.
It shows how to set up couples, planning tasks, vendors, budget lines, a day-of timeline, and your own invoices, how to build a planning checklist backward from the wedding date, how to make a day-of timeline that shifts when the ceremony time does, and how to turn records into PDFs such as timelines, vendor sheets, and invoices. It also covers client privacy. It is general information about organizing a business, not legal, financial, or tax advice.
An important boundary comes first.
Couples share personal and financial details with their planner, and weddings involve money, contracts, and legal requirements. Notion tracks the plan, but it doesn’t replace the marriage license process, the vendor contracts, or a payment system. Keep identity documents and card details out of it, and check the legal and licensing rules that apply to each wedding.
Short answer on how to Use Notion for Wedding Planners:
To use Notion for a wedding planner business, create linked databases for Couples, Tasks, Vendors, Budget Lines, Timeline, and Invoices.
Give every couple a wedding date, and let formulas calculate how many weeks remain and when each planning task is due. Track vendors, quotes, deposits, and balances against the couple’s budget. Build the day-of timeline around the ceremony time, so every item shifts when the ceremony does.
Flag overdue tasks, tight turnarounds, and payments coming due. Put the key facts in report-ready fields, so a timeline or an invoice PDF takes minutes.
In more detail: Notion works well for wedding planners because the work is a countdown to a fixed date.
A couple has tasks that fall due a set number of weeks before the wedding, vendors with payments due on set dates, and a day-of timeline anchored to the ceremony.
A formula subtracts weeks from the wedding date to give each task a due date, another adds minutes to the ceremony time to schedule each moment of the day, and a rollup adds up the budget lines. Notion isn’t a payment tool, a guest list app, a contract platform, or a design tool.
It doesn’t send reminders by itself, so it works best beside your email, your calendar, your payment tool, and your accounting software. For documents couples and vendors receive, you can export a page as a PDF or generate one from a template.
Table of Contents
What Notion Can and Can’t Do for a Wedding Planner
Notion is good for:
- Tracking inquiries, consultations, proposals, and bookings.
- Building a planning checklist with due dates counted back from the wedding.
- Keeping a vendor directory and each wedding’s vendor team.
- Tracking budgets, quotes, deposits, and balances.
- Building a day-of timeline that shifts with the ceremony time.
- Tracking your own planning fees and invoices.
- Creating consistent timelines, vendor sheets, and invoices.
- Taking payments or holding client funds.
- Guest list management with RSVPs, addresses, and seating at scale.
- Contracts and legally binding signatures.
- Design boards, floor plans, or large file storage.
- Automatic reminders to couples or vendors.
- Reliable access at venues with poor connectivity.
- Keep identity documents out of Notion. Passports, IDs, and license details belong with the couple and the authorities. Record the task, such as “Marriage license collected,” and not the document numbers.
- Collect guest information carefully. A guest list holds names, addresses, dietary and accessibility needs, and sometimes health information. Keep it in a purpose-built guest tool, share only what each vendor needs, such as a headcount or a dietary list, and delete details after the wedding according to your policy.
- Keep notes about people factual and kind. Family dynamics, such as who can’t sit near whom, may matter for seating. Record only what’s needed, and keep it restricted.
- Never store card numbers, bank details, or access codes. Payments happen in each payment tool, and door or gate codes should be shared by phone or a secure method.
- Know the legal requirements for each wedding. Marriage license rules, waiting periods, validity windows, officiant requirements, residency rules for destination weddings, and name change paperwork vary by place. Add them as tasks, point the couple to the official source, and don’t give legal advice.
- Check permits and licenses. Venues, street closures, amplified music, fireworks, open flames, and alcohol service can require permits or licensed providers.
- Handle money carefully. If you hold or move client funds, rules on trust accounts and licensing may apply. Many planners have couples pay vendors directly. Check what’s right for you.
- Have your contracts reviewed. Your planning agreement should cover scope, fees, payment schedule, cancellation and postponement, force majeure, vendor liability, and image rights. Have it reviewed by a qualified person, and carry the insurance your venues and your risk require.
- Couples is the main database. Add these properties: Couple Names, Wedding Date, Ceremony Time (with time), Venue, Guest Count, Package (Full Planning, Partial Planning, Month-of Coordination, or Destination), Status (Inquiry, Consultation, Proposal Sent, Booked, Planning, Wedding Week, Done, or Lost), Client Budget, Committed (a rollup), Paid (a rollup), Outstanding (a formula), Budget Remaining (a formula), Weeks Until Wedding (a formula), Planning Phase (a formula), Sunset Time, Golden Hour Start (a formula), Rehearsal Date, Final Headcount Days, Final Headcount Due (a formula), Planning Fee, Notes, and a master timeline text field.
- Tasks stores the checklist. Add: Task, Couple (relation), Category (Venue, Vendors, Design, Attire, Legal, Guests, Logistics, or Admin), Weeks Before Wedding, Wedding Date (a rollup), Due (a formula), Owner (Planner, Couple, Vendor, or Assistant), Status (To Do, In Progress, Waiting, or Done), Waiting Since, Overdue Flag (a formula), and Notes.
- Vendors stores your directory. Add: Vendor, Category (Venue, Caterer, Photographer, Videographer, Florist, Band or DJ, Officiant, Hair and Makeup, Rentals, Cake, Transport, Stationery, or Lighting), Contact, Email, Phone, Price Range, Areas Served, Preferred (a checkbox), Your Rating (1 to 5), Certificate of Insurance Expiry, Insurance Flag (a formula), Usual Arrival Time, Meal Needed (a checkbox), and Notes.
- Budget Lines stores each cost. Add: Item, Couple (relation), Category, Vendor (relation), Estimate, Contract Amount, Deposit Amount, Deposit Due, Deposit Paid (a checkbox), Balance Amount (a formula), Balance Due, Balance Paid (a checkbox), Paid Amount (a formula), Outstanding Amount (a formula), Over Estimate Flag (a formula), and Payment Flag (a formula).
- Timeline stores the day-of schedule. Add: Item, Couple (relation), Type (Prep, Photos, Ceremony, Reception, Logistics, or Teardown), Minutes from Ceremony, Ceremony Time (a rollup), Start (a formula), Duration (minutes), End (a formula), Buffer Minutes, Tight Flag (a formula), Location, Owner (relation to Vendors or a person), Vendors Involved, Status (Planned, Confirmed, or Done), and Notes.
- Invoices stores your own billing. Add: Invoice Number, Couple (relation), Type (Retainer, Installment, Final, or Add-On), Amount, Issued On, Terms (days), Due Date (a formula), Paid On, Status (Draft, Sent, Paid, or Late), Days Late (a formula), and Paid Amount (a formula).
- Pipeline: a board grouped by Status, from Inquiry to Lost.
- Proposals to follow up: couples with the status Proposal Sent, sorted by how long ago.
- By phase: booked couples grouped by planning phase.
- Wedding calendar: a calendar of wedding dates.
- This week: tasks due in the next seven days, grouped by couple.
- Overdue: tasks with the flag.
- Waiting on couple: tasks with the owner Couple and the status Waiting.
- By couple: all tasks for one wedding, for a check-in.
- Directory: all vendors grouped by category, with ratings.
- Preferred: the vendors you recommend first.
- Insurance expiring: vendors with the flag.
- By area: vendors grouped by area served, for destination or out-of-town weddings.
- Master timeline: all items for one wedding, sorted by start.
- By owner: a timeline grouped by owner, so you can see anyone double-booked.
- Tight turnarounds: items with the flag.
- Vendor view: items filtered to one vendor, with arrival, setup, and breakdown times.
- Proposals and planning agreements: the scope, the package, the fees, the payment schedule, and the terms, with wording checked by a qualified person
- Planning checklists for couples, filtered to what they own
- Vendor lists and contact sheets
- Budget summaries: the categories, the contracts, what’s paid, and what’s due
- Day-of timelines: the master schedule, with contacts and addresses
- Vendor timelines: each vendor’s own times and details
- Ceremony order sheets and run-of-show scripts
- Rehearsal schedules
- Invoices and receipts. Notion Receipt Template shows how to structure a receipt.
- Post-wedding summaries, thank-you lists, and feedback requests
- Certificates of insurance requests to send to vendors and venues
- Create your template with your studio’s name, your logo, and your layout.
- Add placeholders in double curly braces where the data should go, such as {{Couple_Names}}
or{{Wedding_Date}}`. - Make sure each placeholder matches the name of a Notion property.
- Start the document with a Notion database button or a status property.
- Ready to Generate creates a PDF from the database record.
- Generate Page converts the Notion page into a PDF.
- Generate PDF and Doc creates a PDF and a Google document.
- Preview creates a Google document so you can check it before making the final PDF.
- Generate E-Signed Doc creates an e-signed PDF in the database workflow.
- Give assistants access to the weddings they work on.
- Keep fees, margins, commissions, and invoices in views that only you can open.
- Keep couples’ budgets and personal details limited to the planner team, and delete them after the wedding as your policy says.
- Never give couples or vendors access to the workspace. Send each of them only their own documents.
- Keep identity documents, card details, and access codes out of Notion entirely.
- Keep guest lists, dietary and accessibility details, and family notes in a restricted place, and share only what each vendor needs.
- Remove access on the day an assistant leaves.
- Review who has access every few months.
- How to Use Notion for a Roofing Business
- How to Use Notion for a Land Survey Company
- How to Use Notion for Home Inspection Business
Notion is not made for:
If you already use a payment tool, a contract tool, a design app, and accounting software, treat Notion as the planning layer beside them. Link to the contracts and files, and don’t try to replace them.
Client Privacy, Contracts, and Legal Basics
A wedding planner sees budgets, family tensions, guest lists, and sometimes immigration or legal paperwork. Handle that with care.
Rules differ by country, state, and venue, so check what applies to you. While you are testing, use made-up couples and vendors.
Use These 6 Databases
Start with these 6 databases. You can add more later, such as Guests, Venues, or Inspirations.
A relation connects a record in one database to a record in another. Link Tasks, Budget Lines, Timeline items, and Invoices to the couple, and link Budget Lines to vendors.
Now a couple’s page shows their tasks, their vendors, their budget, their day-of timeline, and your invoices together.
Couples: From Inquiry to Booked
Most weddings start with a consultation. A consistent record of that first conversation makes the proposal faster and the relationship smoother.
When an inquiry arrives, create a Couple with the status Inquiry. Note the date, the venue (if chosen), the guest count, the budget range, the style, and what kind of help they want. Note how they found you, because your best sources deserve your attention. After the consultation, record what they care about most, in their words, such as “Good food and a relaxed day.” It will guide every decision later.
On Couples, add these formulas:
``
Weeks Until Wedding: floor(dateBetween(prop("Wedding Date"), now(), "days") / 7)
Planning Phase: ifs(
prop("Weeks Until Wedding") < 0, "Past",
prop("Weeks Until Wedding") <= 2, "Final details",
prop("Weeks Until Wedding") <= 8, "Confirmations",
prop("Weeks Until Wedding") <= 26, "Booking and design",
"Early planning"
)
`
The phase shows where each wedding is, at a glance. A board view grouped by phase tells you how your workload will look next month, and a calendar view of wedding dates shows how close together your weddings fall. Be honest about how many weddings you can give full attention to in the same week.
Make these views of Couples:
Planning Tasks: A Checklist Counted Back From the Wedding
A wedding has roughly the same tasks at roughly the same distances from the date. A template counted back from the wedding date saves hours on every couple.
On Tasks, roll up the Wedding Date from the couple, set Weeks Before Wedding on each task, and add:
`
Due: dateAdd(prop("Wedding Date"), -7 * prop("Weeks Before Wedding"), "days")
Overdue Flag: if(and(prop("Status") != "Done", dateBetween(now(), prop("Due"), "days") > 0), "Overdue", "")
`
Create a Wedding Plan template with your standard tasks and their weeks already set. A made-up example, which you should adapt to your style of planning and your region:
| Weeks before | Examples |
|---|---|
| 52 | Budget agreed, guest count estimated, venue and date secured |
| 44 | Photographer, caterer, and officiant booked |
| 36 | Attire shopping started, accommodation blocks arranged |
| 28 | Florist, music, and rentals booked, and save-the-dates sent |
| 20 | Invitations designed, menu tasting, hair and makeup trial booked |
| 12 | Invitations sent, marriage license requirements checked, transport arranged |
| 8 | Seating started, vendor timelines requested, music list confirmed |
| 4 | Final headcount, final vendor payments scheduled, timeline drafted |
| 2 | Vendor confirmations, timeline sent, rehearsal planned |
| 1 | Final payments, tip envelopes, emergency kit, weather plan |
| 0 | Wedding day |
| −1 | Vendor returns, thank-yous, final invoices, photos delivered |
Many tasks depend on the couple’s decisions, and waiting is where a plan quietly stalls. Give each task an owner, and use the status Waiting with a date when you’re waiting on the couple or a vendor:
`
Waiting Flag: if(and(prop("Status") == "Waiting", dateBetween(now(), prop("Waiting Since"), "days") >= 5), "Chase", "")
`
The flag shows anything you’ve been waiting on for five days. A polite, specific nudge (“We need the final menu choice by Friday to hold the date”) keeps things moving without nagging.
Make these views of Tasks:
> 💡 Pro Tip: Send each couple a short list every two weeks: “Here’s what we’ve done, what we need from you, and what’s coming.” It’s the one message that most reduces anxiety, and it comes straight from a filtered Tasks view.
Vendors: Your Directory and Each Wedding’s Team
Your vendor relationships are among your most valuable assets. A good record turns “who do I call for a bakery in this town?” into a search.
In Vendors, record each vendor’s category, contact details, price range, areas they serve, and your own rating after each wedding. Tick Preferred for the ones you trust. Record the expiry date of their certificate of insurance, since many venues require one, and add:
`
Insurance Flag: if(dateBetween(prop("Certificate of Insurance Expiry"), now(), "days") <= 60, "Insurance expiring", "")
`
For each wedding, link the booked vendors to the couple through Budget Lines. A view of Vendors grouped by couple becomes the wedding’s vendor team. Record, for each, the arrival time, whether they need a meal (many photographers, bands, and DJs expect one), who their on-site contact is, and any special requirements, such as power, loading access, or a changing room.
Make these views of Vendors:
Be transparent about commissions or referral fees, if you receive any. Your couples should know whether a recommendation comes with a payment, and local rules on disclosure may apply.
Budget Lines: Quotes, Deposits, and Balances
Couples’ budgets are rarely simple. A single spreadsheet that tracks the estimate, the quote, what’s paid, and what’s due keeps everyone informed.
Create a Budget Line for each cost, such as the venue, the caterer, the photographer, and the attire, with an estimate at the start and the contract amount once booked. Record the deposit amount and due date, and the balance due date. Then add:
`
Balance Amount: prop("Contract Amount") - prop("Deposit Amount")
Paid Amount: if(prop("Deposit Paid"), prop("Deposit Amount"), 0) + if(prop("Balance Paid"), prop("Balance Amount"), 0)
Outstanding Amount: prop("Contract Amount") - prop("Paid Amount")
Over Estimate Flag: if(prop("Contract Amount") > prop("Estimate") * 1.1, "Over estimate", "")
Payment Flag: if(and(not prop("Deposit Paid"), dateBetween(prop("Deposit Due"), now(), "days") <= 7), "Deposit due", if(and(not prop("Balance Paid"), dateBetween(prop("Balance Due"), now(), "days") <= 14), "Balance due", ""))
`
On Couples, roll up the contract amounts as Committed, the paid amounts as Paid, and the outstanding amounts. Then add:
`
Outstanding: prop("Committed") - prop("Paid")
Budget Remaining: prop("Client Budget") - prop("Committed")
`
Here is a made-up budget of 40,000. The shares are examples, and every couple’s priorities, region, and guest count will be different.
| Category | Amount | Share |
|---|---|---|
| Venue and catering | 20,000 | 50% |
| Photography and video | 5,200 | 13% |
| Flowers and decor | 4,800 | 12% |
| Music | 3,200 | 8% |
| Attire and beauty | 3,600 | 9% |
| Other, including stationery, transport, and a contingency | 3,200 | 8% |
| Total | 40,000 | 100% |
Make a Payments coming up view of Budget Lines, grouped by month, with the amounts due. It shows the couple’s cash flow, and yours, for any payments you handle. Most planners ask couples to pay vendors directly. If you do make payments on their behalf, follow the rules and your agreement, and keep clear records.
The Day-of Timeline
The day-of timeline is the document everyone works from, so it has to be accurate, shared, and flexible. The most useful trick is to anchor everything to the ceremony time.
On Timeline items, roll up the Ceremony Time from the couple, set Minutes from Ceremony on each item (negative before the ceremony, positive after), and add:
`
Start: dateAdd(prop("Ceremony Time"), prop("Minutes from Ceremony"), "minutes")
End: dateAdd(prop("Start"), prop("Duration"), "minutes")
Tight Flag: if(prop("Buffer Minutes") < 10, "Tight", "")
`
If the ceremony moves from four to five o’clock, every item shifts by an hour, with no re-typing. Create a Day-of Timeline template with the usual items, and adjust it for each wedding. A made-up example for a four o’clock ceremony:
| Time | Minutes from ceremony | Item |
|---|---|---|
| 09:00 | −420 | Hair and makeup begins |
| 12:00 | −240 | Light lunch for the wedding party |
| 13:00 | −180 | Photographer arrives, getting-ready photos |
| 14:30 | −90 | First look |
| 15:30 | −30 | Guests begin arriving, music starts |
| 15:50 | −10 | Ceremony party lines up |
| 16:00 | 0 | Ceremony |
| 16:30 | +30 | Cocktail hour, family portraits |
| 17:45 | +105 | Grand entrance and first dance |
| 18:00 | +120 | Dinner service |
| 21:45 | +345 | Last dance and send-off |
| 22:00 | +360 | Vendor breakdown |
Use the sunset time, because outdoor photographs depend on it. Record the sunset time for the date and place on the couple, and add:
`
Golden Hour Start: dateAdd(prop("Sunset Time"), -60, "minutes")
`
Compare it with your timeline, and plan portraits for that window, if the couple wants them. It’s a good reason to adjust a ceremony time, before the contracts are signed.
Give every item an owner, who is responsible for making it happen, and list the vendors involved. Make these views of Timeline:
Send each vendor only what they need: their own times, the contacts they’ll work with, the venue address and access, and the master timeline for context. Send the final version a week ahead, and again the day before, and ask each vendor to confirm. Record the confirmations by changing the status to Confirmed.
Don’t rely on Notion at the venue. Reception can be poor, and a page that won’t load at the wrong moment is a serious problem. Print the timeline, and keep a copy on your phone as a PDF.
Rehearsals, Weather Plans, and Emergency Kits
A few extra records prevent most last-minute drama.
The rehearsal. Add the rehearsal as a Timeline item and as a task, with its time, place, and who’s expected. Prepare a one-page order of the ceremony, with who stands where and who walks when, and bring copies.
The weather plan. For outdoor weddings, write a plan B, with the trigger. Decide who makes the call, and by what time, because tents, tables, and chairs take hours to move. Record the decision time on the timeline, and tell the vendors who’ll be affected. Check your venue’s rules and your contracts for what a weather change costs.
The emergency kit. Build a checklist template of the items you carry: sewing supplies, safety pins, stain remover, tape, scissors, a phone charger, pain relief, bandages, mints, a small steamer, comb and hairspray, spare buttons, shoe inserts, water and snacks, and extra copies of the timeline and vendor contacts. Check it before every wedding.
Envelopes and gratuities. Prepare tip envelopes only for vendors whose contracts or customs call for them, and label them. Check what’s included in each vendor’s contract, and whether any service charge already covers it.
Contact sheet. Make a one-page list of everyone’s name, role, and phone number, including the couple’s emergency contact, the venue manager, and the vendors’ on-site leads. Keep it in the timeline PDF, and give it to your assistant.
Your Fees and Invoices
Wedding planning fees are usually paid in installments, and a clear schedule keeps your cash flow steady. Write the terms in your agreement, and use Notion to track them.
Here is a made-up full-planning fee for the 40,000 wedding. Many planners charge a flat fee, a percentage of the budget, or an hourly rate. The 12 percent here is an example.
| Item | Value |
|---|---|
| Planning fee (12% of 40,000) | 4,800 |
| Retainer at signing (30%) | 1,440 |
| Installment six months before (40%) | 1,920 |
| Final installment one month before (30%) | 1,440 |
| Total | 4,800 |
`
Due Date: dateAdd(prop("Issued On"), prop("Terms"), "days")
Days Late: if(prop("Status") == "Sent", max(0, dateBetween(now(), prop("Due Date"), "days")), 0)
Paid Amount: if(prop("Status") == "Paid", prop("Amount"), 0)
`
A view called Invoices due shows what’s coming and what’s late. Payments happen in your payment tool, and you update the status in Notion when the money arrives. Don’t treat a date as held until the retainer is paid, and state in your agreement what happens if the couple changes the date, reduces the scope, or cancels. Be kind and clear in reminders, because couples are juggling a great deal. Tax rules differ by country, so check what applies to you. Notion Receipt Template shows how to structure a receipt.
Your Business Numbers
A planning business has a few numbers worth watching. Here is a made-up year.
| Item | Value |
|---|---|
| Consultations | 40 |
| Booked | 14 |
| Close rate | 35% |
| Average planning fee | 4,800 |
| Revenue | 67,200 |
| Planning hours per wedding | 95 |
| Effective hourly rate | 50.53 |
| Weddings finished within the couple’s budget | 11 of 14 |
| Within-budget rate | 79% |
Also watch the time between inquiry and booking, which packages are most profitable, your busiest months, your referral sources, and how many weddings you can run at once before quality slips. A small sample can mislead, so treat these as guides. They leave out your costs, insurance, marketing, and tax, so check the full figures with an accountant. Test every formula with made-up numbers and check it with a calculator.
A Friday Before a Saturday Wedding
To see how the pieces fit, here is one made-up Friday for a planner and her assistant, the day before a 120-guest wedding.
7:30 am. She opens the Tasks This week view. Four items are due today: confirm the florist’s arrival time, deliver the final timeline to the vendors, prepare the tip envelopes, and check the weather plan.
8:00 am. The Couples view shows the wedding in the Final details phase. The forecast shows a chance of rain, so she checks the weather plan: the decision time is noon, and the tent crew has been told.
9:00 am. The Timeline’s Vendor view shows two vendors who haven’t confirmed. She calls the DJ and the rentals company, and changes their items to Confirmed.
10:30 am. The Payment flag on Budget Lines shows two balances due. She checks that both have been paid or scheduled, and records it.
12:00 pm. Rain is unlikely, so she confirms the outdoor plan with the venue and the couple, and logs the decision time and who was told.
2:00 pm. She prints the timeline and the contact sheet, packs the emergency kit from the checklist, and puts the tip envelopes in her bag.
4:30 pm. At the rehearsal, she walks through the ceremony with the wedding party, and notes a late arrival for the bride’s grandmother. She adds ten minutes of buffer to the seating item.
6:00 pm. She sets the final timeline to Ready to Generate, and the PDF goes to the couple and the vendors.
Nothing depended on her memory, and she could sleep.
The Documents That Leave Notion
Couples and vendors don’t use your workspace, so some records need to become files:
For a single page, you can use Notion’s export option. How to Export Notion to PDF shows the settings. Couples judge a planner partly by the polish and clarity of what they receive, and Notion’s own export gives you limited control over layout. How to Add Your Logo and Brand Colors to Notion PDFs explains how a template solves that.
Generating PDFs with PDFOutput
PDFOutput creates documents from your Notion data using a template. A template can be a Google document, a Word file, a PDF file, or a Notion page. If you already have a timeline or proposal layout in Word or Google Docs, you can reuse it.
Here is how it works:
These are some of the status options:
The e-signed option may help with planning agreements. Whether an electronic signature is valid for a given agreement depends on your location and the type of document, so check before you rely on it. You can save the finished file to a property in your database, so a timeline stays on the couple’s record. You can also save it to a Google Drive folder and store the link in a property.
Three kinds of document work well.
An invoice uses the fields on one invoice record: the couple, the number, the amount, the due date, and your payment text.
A proposal uses the fields on one couple record: the package, the fee, the schedule, and your standard terms.
A day-of timeline uses the master timeline field on the couple record, written as text. If you’d like a timeline built directly from every Timeline item, or a vendor sheet for each vendor, test a template with a sample wedding that has many items, and check that each appears in the right order.
If it doesn’t, assemble the timeline as text on the couple record, and use that in the template. Many planners paste the final schedule into that field once it’s settled.
Before using any document tool with information about your couples, ask the provider how data is handled, where it’s stored, and what agreements are available, and keep the answers with your records.
The safest approach is to generate documents from records that hold only what the recipient should see. A vendor’s timeline shouldn’t show the couple’s budget, and a couple’s document shouldn’t show your vendor commissions or other couples’ details. Check the names, the dates, the times, and the addresses on every document before you send it.
Start with the day-of timeline, since everyone depends on it. Use Preview first and check for empty fields, the right date, the right times, and contact details that work.
> 📌 Key Takeaway: Count the planning checklist back from the wedding date, track every vendor and payment against the budget, and anchor the day-of timeline to the ceremony time so it shifts when the plan does. Then timelines, vendor sheets, and invoices come from records you already have, and the day itself runs on a plan.
Who Can See What
Your workspace will hold couples’ budgets, personal details, and vendor terms, so control access tightly.
Common Mistakes
Planning forward from today. Count tasks back from the wedding date, so they move when the date moves.
Letting decisions stall. Use the Waiting status and the chase flag, and be specific about deadlines.
Not tracking deposits and balances. A missed payment can cost a booking. Use the payment flags.
No contingency in the budget. Build in a buffer, and tell the couple why.
An unrealistic timeline. Count travel, hair and makeup, family portraits, and buffers, and use sunset.
Typing every time by hand. Anchor items to the ceremony time so a change moves everything.
Forgetting vendor meals and insurance. Track them before the day, not during.
Relying on Notion at the venue. Print the timeline, and keep a PDF on your phone.
Skipping the weather plan. Decide the trigger and the decision time in advance.
Sharing too much with vendors. Each vendor needs only their own times and contacts.
Storing identity documents. Keep them with the couple.
Taking on too many weddings. Look at your calendar before you say yes.
Too many properties. If a task takes ten minutes to set up, it won’t get done. Keep the templates short.
No owner for the structure. If more than one person edits the workspace, pick one person responsible for the setup. Properties get renamed and formulas break, so tell that person not to rename properties used in PDF templates, because the placeholders must match exactly.
Skipping a test. Run a month with made-up couples first, and fix what annoys you before you use real records.
Frequently Asked Questions
Can Notion be used to run a wedding planning business?
Yes, for the planning and coordination side. It can organize couples, tasks, vendors, budgets, day-of timelines, and your own invoices. It isn’t a payment tool, a contract platform, or a guest list manager at scale, so use dedicated tools for those.
How do I build a wedding planning checklist in Notion?
Create a Tasks database linked to each couple, with a number of weeks before the wedding on each task. Roll up the wedding date, and use a formula to subtract the weeks for the due date. Save the standard tasks as a template, so every new couple starts with a full checklist, and the dates move if the wedding date does.
How do I create a day-of wedding timeline in Notion?
Record the ceremony time on the couple, and give each timeline item a number of minutes before or after the ceremony. A formula adds the minutes to the ceremony time to get each start time, and another adds the duration to get the end time. If the ceremony time changes, everything shifts.
How do I track a wedding budget and vendor payments in Notion?
Create a Budget Lines database with an estimate, a contract amount, a deposit, a balance, and due dates for each cost. Use formulas for the balance, the amount paid, and what’s outstanding, and flag payments coming due. Roll the totals up to the couple, and compare them with the budget.
How do I share timelines with vendors?
Generate a PDF of the master timeline, and one for each vendor with only their own times and contacts, using a template-based tool or Notion’s export. Send them a week before and the day before, ask them to confirm, and bring printed copies to the wedding.
Is it safe to store couples’ information in Notion?
Notion lets you control who sees each page, but your duties depend on the rules where you work. Collect only what you need, keep identity documents, card details, and access codes out, handle guest lists and family notes with care, limit access to the people who need it, and delete details after the wedding.
Can I create timelines, vendor sheets, and invoices from Notion?
You can export a page as a PDF, or use a template-based tool such as PDFOutput to fill a timeline, vendor sheet, or invoice template with data from each record. Put the key facts in clearly named properties on one record, test it on a few sample records first, and check each document before you send it.
Related Reading
A good wedding planner setup in Notion keeps both timelines under control: a checklist counted back from the wedding date, a vendor team and a budget that match the contracts, and a day-of timeline anchored to the ceremony so one change updates everything. Keep identity documents and guest data out, check the legal and licensing rules for each wedding, print what you need at the venue, and run a month with made-up couples first. When your timelines, vendor sheets, and invoices need to leave Notion, PDFOutput can fill your template from each record and save the PDF to your chosen storage.
Want timelines and invoices as clean PDFs? Try PDFOutput.