Guides
How to Use Notion for a Roofing Business: Estimates, Crews, and Job Photos
Learn how to set up Notion for a roofing business with estimates, crew scheduling, material orders, job photos, and invoices, plus PDF estimates, job sheets, and photo reports.
By Sanat Biswal · 2026-11-07 · 5 min read
{/ synced-from-notion — do not edit manually /}
A roofing company sells a result nobody sees until it rains.
The work happens on a steep surface, at height, in changing weather, and the homeowner can’t inspect it afterward. That makes three things unusually important: an estimate that’s built the same way every time, a crew schedule that survives rain delays, and a photo record that proves what was found, what was done, and what the roof looked like when you left.
Most roofers hold this in a pickup-truck notebook, a camera roll, a group chat with the crews, and an estimating spreadsheet, and the cost shows up as underpriced jobs, missed material orders, disputes with no evidence, and warranty claims nobody can document.
Notion can hold the management layer in one place. This guide is for owner-operators, estimators, and office managers at small and mid-sized roofing companies, residential and light commercial. It follows a job from the first lead to the final invoice and the warranty.
It shows how to set up customers, jobs, crews, photos, material orders, and invoices, how to calculate an estimate from the roof’s measurements, how to price for a target margin, how to schedule crews and materials around weather, and how to organize job photos so they’re ready when an insurer or a customer asks. It also covers safety, insurance claims, and privacy.
It is general information about organizing a business, not legal, insurance, safety, or construction advice.
An important boundary comes first.
Roofing is regulated: contractor licensing, permits, insurance, safety rules for work at height, consumer protection rules for contracts and deposits, and special rules around insurance claims.
Notion tracks your jobs, dates, and files, but it doesn’t replace your safety program, your contracts, or your legal compliance. Where this guide mentions a rule, treat it as a pointer to check, and not as advice.
Short answer on how to Use Notion for roofing business:
To use Notion for a roofing business, create linked databases for Customers, Jobs, Crews, Photos, Material Orders, and Invoices. Calculate each estimate from the footprint, pitch, and waste factor, and price it from direct costs for a target margin.
Schedule crews by squares per day, order materials from the install date minus the supplier’s lead time, and flag permits and orders that are late. Give every job a photo set, with a checklist of before, during, and after shots stored in cloud storage and linked from Notion.
Track deposits, progress payments, and final balances. Put the key facts in report-ready fields, so an estimate or a job sheet PDF takes minutes.
Notion works well for roofers because the work is a chain of measurable steps. A roof has an area, the area has a number of squares, the squares drive materials and labor, and the labor drives crew days.
A formula turns the footprint and pitch into squares, another adds waste for the material order, another turns direct cost and a target margin into a price, and another turns squares and a crew’s daily output into an end date.
Notion isn’t a measuring tool, an accounting system, a payment tool, or a photo archive. It doesn’t send reminders by itself, so it works best beside your measurement reports, your cloud storage, your phone, and your accounting software.
For documents customers and crews receive, you can export a page as a PDF or generate one from a template.
Table of Contents
What Notion Can and Can’t Do for a Roofing Business
Notion is good for:
- Tracking leads, inspections, estimates, and signed jobs.
- Calculating estimates from measurements, and pricing for a target margin.
- Scheduling crews, material deliveries, and permits.
- Keeping a photo checklist and links to each job’s photos.
- Tracking change orders, deposits, progress payments, and balances.
- Tracking crew training, insurance, and certificates.
- Creating consistent estimates, job sheets, and photo reports.
- Aerial measurement, drawing, or design.
- Storing hundreds of full-size photos.
- Taking payments or full accounting and payroll.
- Legally binding contracts or lien filings.
- Automatic reminders to customers or crews.
- Replacing your safety program.
- Put safety first, and record it. Falls are the leading danger in roofing. Follow the safety rules that apply to you for fall protection, ladders, training, and equipment. Record each crew’s training and certificate expiry dates in Notion, and keep a daily safety talk or checklist on each job. Notion records, it doesn’t protect anyone, so make sure the real procedures are in place.
- Check licensing, permits, and insurance. Contractor licenses, local permits, general liability cover, and workers’ compensation requirements vary by place. Track expiry dates, and ask subcontractors for current certificates of insurance.
- Know your worker classification rules. Whether a crew member is an employee or an independent contractor is regulated. Get advice before you decide.
- Be careful with insurance claims. Many places restrict what a contractor may do on a claim, such as acting as the homeowner’s adjuster or negotiating the claim, and many forbid offering to waive or absorb the deductible. Check the rules where you work, and be honest with homeowners about what you can and can’t do.
- Follow the sales rules. Some places regulate door-to-door sales, especially after storms, and give consumers a right to cancel certain contracts within a few days. Others limit deposits or require specific contract wording. Check what applies, and have your contract reviewed.
- Protect customer information. Addresses, photos of homes, claim numbers, and payment details are sensitive. Keep card numbers, insurer logins, and access codes out of Notion.
- Get permission for marketing photos. Using a customer’s roof in advertising is a separate permission from the work itself.
- Customers stores who you work for. Add these properties: Name, Phone, Email, Property Address, Source (Referral, Canvass, Website, Insurance, or Other), Notes, and a Jobs relation. Keep it to what you need.
- Jobs is the main database. Add: Job Number, Customer (relation), Type (Re-Roof, Repair, New Construction, Storm Damage, or Inspection), Status (Lead, Inspection Scheduled, Estimate Sent, Contract Signed, Permit Pending, Materials Ordered, Scheduled, In Progress, Final Inspection, Complete, Invoiced, or Paid), Estimate Sent On, Footprint Sq Ft, Pitch Factor, Roof Area (a formula), Squares (a formula), Waste %, Squares to Order (a formula), Material Cost per Square, Labor Cost per Square, Disposal Cost, Permit Fee, Decking Sheets, Price per Sheet, Decking Allowance (a formula), Direct Cost (a formula), Target Margin, Price (a formula), Markup % (a formula), Change Orders Total, Final Price (a formula), Deposit %, Deposit Amount (a formula), Permit Required, Permit Status, Crew (relation), Install Start, Squares per Day, Production Days (a formula), Install End (a formula), Photo counts (rollups), and several flags.
- Crews stores your crews and subcontractors. Add: Crew Name, Lead, Size, Skills (Shingle, Tile, Metal, Flat Roof, or Repairs), Squares per Day, Employee or Subcontractor, Safety Training Expiry, Insurance Certificate Expiry, Compliance Flag (a formula), and Notes.
- Photos stores links and tags. Add: Job (relation), Stage (Before, Damage, Tear-Off, Decking, Underlayment, Flashing, Final, or Cleanup), Area (Front Slope, Rear Slope, Chimney, Valley, Vents, Gutters, or Other), Taken On, Taken By, Link, Shows Damage (a checkbox), Shared with Customer (a checkbox), Shared with Insurer (a checkbox), Is Before (a formula), Is Final (a formula), and Notes.
- Material Orders stores deliveries. Add: Job (relation), Supplier, Items Summary, Lead Days, Install Start (a rollup), Order By (a formula), Delivery Date, Status (To Order, Ordered, Delivered, Short, or Returned), Order Flag (a formula), Color and Lot Numbers, and Notes.
- Invoices stores billing. Add: Invoice Number, Job (relation), Type (Deposit, Progress, Final, or Change Order), Payer (Homeowner, Insurer, or Lender), Amount, Issued On, Terms (days), Due Date (a formula), Paid On, Status (Draft, Sent, Paid, or Late), Days Late (a formula), and Paid Amount (a formula).
- Pipeline: a board grouped by Status, from Lead to Paid.
- Estimates to follow up: jobs with the flag.
- By source: jobs grouped by where the lead came from, to see what pays for itself.
- [ ] All four sides of the house and the whole roof, before work starts
- [ ] Each slope, from the ground and, where safe, from the roof
- [ ] Existing damage, close up and in context
- [ ] Penetrations, chimneys, valleys, skylights, and vents
- [ ] Decking after tear-off, including any rot or damage
- [ ] Underlayment and ice and water protection installed
- [ ] Flashing at walls, chimneys, valleys, and penetrations
- [ ] Ridge and vents finished
- [ ] Final photos of every slope and the whole roof
- [ ] Gutters, landscaping, and driveway after cleanup
- Estimates and proposals: the scope, the materials, the options, the price, and the terms
- Contracts and change orders, with wording checked by a qualified person
- Crew job sheets: the address, the scope, the materials, the schedule, the hazards, and the checklist
- Material orders for suppliers
- Photo reports: a summary of the damage or the work, with the photos linked, for customers and insurers
- Warranty certificates: your workmanship warranty, and the manufacturer’s registration details
- Completion certificates and cleanup sign-offs
- Invoices and receipts. Notion Receipt Template shows how to structure a receipt.
- Safety talk logs and training records
- Certificate of insurance requests to subcontractors
- Create your template with your company name, your license details, your logo, and your layout.
- Add placeholders in double curly braces where the data should go, such as {{Customer_Name}}
or{{Price}}`. - Make sure each placeholder matches the name of a Notion property.
- Start the document with a Notion database button or a status property.
- Ready to Generate creates a PDF from the database record.
- Generate Page converts the Notion page into a PDF.
- Generate PDF and Doc creates a PDF and a Google document.
- Preview creates a Google document so you can check it before making the final PDF.
- Generate E-Signed Doc creates an e-signed PDF in the database workflow.
- Give crew leads access to their own job sheets, or send them PDFs.
- Give the estimator access to leads, jobs, and estimates.
- Keep costs, margins, and invoices in views that only the owner and the office manager can open.
- Keep subcontractors’ tax documents and personal details out of Notion.
- Never give customers or insurers access to the workspace. Send each of them only their own documents.
- Keep card details, insurer logins, and access codes out of Notion entirely.
- Keep photos in secure cloud storage with controlled sharing, and send links to the people who need them.
- Remove access on the day someone leaves.
- Review who has access every few months.
- How to Use Notion for a Home Inspection Business
- How to Use Notion for a Land Surveying Company
- How to Use Notion for an HVAC Company
- PDF Automation for Donation Receipts
Notion is not made for:
If you already use a measurement service, cloud storage, accounting software, and a payment tool, treat Notion as the coordination layer beside them. Link to the files and records by path, and don’t try to replace them.
Safety, Insurance Claims, and Privacy
Roofing is among the most dangerous trades, and roofers deal with other people’s homes and insurance money.
Rules differ by country, state, and city, so check what applies to you. While you are testing, use made-up customers and jobs.
The Six Databases
Start with these six. You can add more later, such as Suppliers, Subcontractors, or Warranty Claims.
A relation connects a record in one database to a record in another. Link Jobs to Customers and Crews, and link Photos, Material Orders, and Invoices to Jobs. Now a job’s page shows its customer, its estimate, its crew, its photos, its materials, and its invoices together.
Leads and Inspections
Most roofing jobs start with a call about a leak, a missing shingle, or a storm. A consistent first step makes the estimate faster and more accurate.
Create a Job with the status Lead, and a Customer if they’re new. Ask the same questions each time: the address, the age and type of roof, what the problem is, whether there’s an active leak, whether there’s an insurance claim, any HOA or historic district rules, and how they found you.
Book an inspection, and record the time. After the inspection, record what you found, take the photos, and take the measurements.
Add a follow-up flag so estimates don’t go quiet:
``
Estimate Flag: if(and(prop("Status") == "Estimate Sent", dateBetween(now(), prop("Estimate Sent On"), "days") >= 3), "Follow up", "")
`
Make these views of Jobs:
Respond quickly. A homeowner with a leak will usually hire whoever shows up first with a clear estimate.
Estimates: Squares, Waste, and Margin
Roofers price in squares. One square is 100 square feet of roof surface. A footprint measured from the ground understates the roof, because the slope adds area, so a pitch factor converts one to the other.
On Jobs, record the footprint, the pitch factor (from a chart, or from your measurement report), a waste percentage for cuts and overlaps, and your unit costs. Then add:
`
Roof Area: prop("Footprint Sq Ft") * prop("Pitch Factor")
Squares: round(prop("Roof Area") / 10) / 10
Squares to Order: ceil(prop("Squares") * (1 + prop("Waste %")))
Materials Cost: prop("Squares to Order") * prop("Material Cost per Square")
Labor Cost: prop("Squares") * prop("Labor Cost per Square")
Decking Allowance: prop("Decking Sheets") * prop("Price per Sheet")
Direct Cost: prop("Materials Cost") + prop("Labor Cost") + prop("Disposal Cost") + prop("Permit Fee") + prop("Decking Allowance")
`
The waste percentage depends on the roof’s shape: simple gable roofs waste less than roofs with many valleys, hips, and dormers. Use your own history, and measurements from a reliable source.
Price from the margin, not a markup. A common mistake is adding a percentage on top of cost and calling it the margin. A 35 percent markup gives a margin of only 26 percent. To get a target margin on the price, divide the cost:
`
Price: if(prop("Target Margin") < 1, prop("Direct Cost") / (1 - prop("Target Margin")), 0)
Markup %: if(prop("Direct Cost") > 0, prop("Price") / prop("Direct Cost") - 1, 0)
`
Here is a made-up re-roof. Amounts are in your own currency, and the pitch factor, costs, and rates are examples only. Real figures depend on your market, materials, labor, and the roof.
| Item | Value |
|---|---|
| Footprint | 1,800 sq ft |
| Pitch factor (about 6 in 12) | 1.118 |
| Roof area | 2,012.4 sq ft |
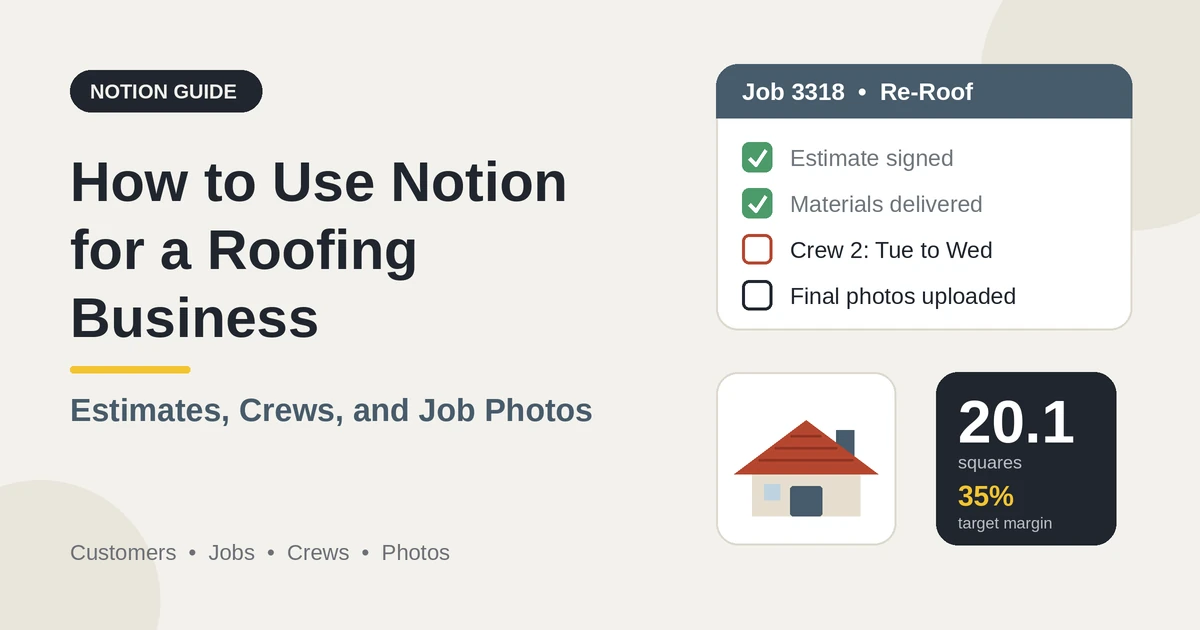
| Squares | 20.1 |
| Waste 12% | order 23 squares |
| Materials (23 × 135) | 3,105 |
| Labor (20.1 × 120) | 2,412 |
| Disposal | 450 |
| Permit | 200 |
| Decking allowance (4 sheets × 75) | 300 |
| Direct cost | 6,467 |
| Price at a 35% margin | 9,949.23 |
| Gross profit | 3,482.23 |
| Equivalent markup | 53.8% |
| Deposit at 30% | 2,984.77 |
Many roofers aim for a target that leaves room for all of those, and the right figure depends on your costs and your market. Track your actual overhead before you pick a margin.
Offer options when it makes sense, such as a standard shingle, an upgraded shingle with a longer warranty, and a premium system. Present each option with its price, what’s included, and the warranty terms. Customers often choose the middle one.
> 💡 Pro Tip: After each job, enter the actual material and labor costs next to the estimate. After twenty jobs, you’ll see which roof types you underprice, and you can adjust your waste factors and labor rates with evidence.
Contracts, Change Orders, and Deposits
A clear contract protects the homeowner and you. Have your standard agreement reviewed by a qualified person, and make sure it covers the scope, the price, the materials, the schedule and weather delays, the payment terms, the warranty, cleanup, and how changes are handled, along with any wording your law requires.
Record the signing date, and move the job to Contract Signed. Record the deposit, and don’t order materials or schedule the crew until it’s paid, if your terms say so. Check the rules on deposits, which some places limit, and on any right to cancel.
Roofing jobs often reveal hidden problems, such as rotted decking or damaged framing.
Use change orders: a short written agreement, signed before the extra work starts, stating what was found, what will be done, and the price. Record the photos that show the problem in the Photos database, and link them to the job. Then add:
`
Final Price: prop("Price") + prop("Change Orders Total")
`
Customers rarely dispute extra work when they’ve seen the photo and agreed to the price first. They often do when the first they hear of it is the final bill.
Crews and Scheduling
A roof is a one-to-three-day job that depends on dry weather, so scheduling is a daily puzzle. A little structure helps.
On each crew, record the squares per day they typically install, for the type of work they do. On Jobs, link the crew, set the install start, and add:
`
Production Days: ceil(prop("Squares") / prop("Squares per Day"))
Install End: dateAdd(prop("Install Start"), prop("Production Days") - 1, "days")
`
A 20.1-square roof for a crew that installs 12 squares a day takes 2 days. Use your own numbers, and build in extra days for steep, complex, or tile roofs.
Show the schedule as a timeline view grouped by crew, so overlaps and gaps are obvious.
Add a Weather reschedule view of jobs with an install start in the next three days, so you can move them quickly when rain arrives. Tell customers early about weather delays, and have your contract say what happens when it rains.
Track compliance for crews and subcontractors:
`
Compliance Flag: if(or(dateBetween(prop("Safety Training Expiry"), now(), "days") <= 30, dateBetween(prop("Insurance Certificate Expiry"), now(), "days") <= 30), "Renew", "")
`
Use a Job Day checklist for each crew: safety talk done, fall protection set up, materials checked against the order, protection for landscaping and driveways in place, nails swept with a magnet at the end, and the site left clean. Photograph the end of each day, so any problem shows up early.
Material Orders and Permits
Late materials and missing permits are the two most common reasons a crew sits idle. Let the dates remind you.
On Material Orders, roll up the install start from the job, set the supplier’s lead time in days, and add:
`
Order By: dateAdd(prop("Install Start"), -1 * prop("Lead Days"), "days")
Order Flag: if(and(prop("Status") == "To Order", dateBetween(prop("Order By"), now(), "days") <= 2), "Order now", "")
`
Record the delivery date, check the delivery against the order when it arrives, and note any shortages. Keep the color and lot numbers of the shingles, since a later repair, or a warranty claim, may need to match them.
Add a permit flag on Jobs:
`
Permit Flag: if(and(prop("Permit Required"), prop("Permit Status") != "Approved", dateBetween(prop("Install Start"), now(), "days") >= 0, dateBetween(prop("Install Start"), now(), "days") <= 7), "Permit not approved", "")
`
Check what permits, inspections, and HOA or historic approvals each job needs, and record the inspection dates. A failed final inspection can delay payment and the warranty.
Job Photos: The Record That Protects You
Photos are your best evidence. They show what the roof looked like before, what was hidden under it, what you did, and how you left it. They support insurance claims, resolve disputes, back up warranty registrations, and help you teach new crew members.
Store the originals in cloud storage, with one folder per job. Hundreds of full-size photos make Notion slow, and storage limits apply. In the Photos database, record a link to each folder or group of images, tagged by stage and area, and embed a few key ones if you like. Name folders with the job number.
Use a Photo Checklist template on each job:
Take photos with the date and location recorded on the phone, and don’t edit them. Keep a minimum set for each stage, so the record is the same on every job.
To catch missing photos, add helper formulas on Photos, and roll up the sums on Jobs:
`
Is Before: if(prop("Stage") == "Before", 1, 0)
Is Final: if(prop("Stage") == "Final", 1, 0)
Photo Flag: if(and(prop("Status") == "In Progress", prop("Before Photos") < 8), "Add before photos", if(and(prop("Status") == "Complete", prop("Final Photos") < 6), "Add final photos", ""))
`
The thresholds are examples, so set them to your own minimum set. A job can’t be marked Complete in your own process until the flag clears.
Tick Shows Damage on photos that document damage, and Shared with Customer or Shared with Insurer when you send them, so you know who has seen what. Be careful with images that show people, children, neighbors’ property, or the inside of a home. Get written permission before you use a customer’s roof in marketing.
Insurance Claim Jobs
Storm and damage work often involves an insurance claim. It brings extra paperwork and extra risk, so track it carefully.
For claim jobs, add properties on Jobs: Claim Status (None, Filed, Inspection Scheduled, Approved, Denied, or Supplement Requested), Insurer, Claim Reference, Deductible, Approved Amount, and Supplement Amount. Keep the claim reference, but don’t store insurer logins.
Be clear with the homeowner about your role. In many places, the homeowner files and manages the claim, a contractor may document damage and give an estimate but shouldn’t act as the adjuster, and the deductible is the homeowner’s responsibility.
Offering to waive or rebate it is illegal in many places and can harm the homeowner. Check the rules that apply, and put your policy in your contract.
Use your photos to document the damage clearly: the date, the location, and close-ups with a scale reference. If the insurer approves less than the work needs, or hidden damage is found, a supplement request with photos and the reason is the normal route. Record the date, the amount, and the outcome. Insurer payments often arrive as two-party checks or in stages, so record the payer on each invoice.
Invoices and Payments
Roofing payments typically come in stages: a deposit at signing, perhaps a progress payment when materials are delivered, and the balance on completion. Write the terms in your contract, and use Notion to track them.
For each job, create Invoice records, with a type, a payer, an amount, an issue date, and the payment terms. Then add:
`
Due Date: dateAdd(prop("Issued On"), prop("Terms"), "days")
Days Late: if(prop("Status") == "Sent", max(0, dateBetween(now(), prop("Due Date"), "days")), 0)
Late Flag: if(prop("Days Late") > 0, "Late", "")
Paid Amount: if(prop("Status") == "Paid", prop("Amount"), 0)
`
A Ready to invoice view shows jobs with the status Complete and no final invoice, so finished work doesn’t wait for a bill. Don’t ask for the final payment until the work is done and any required inspection has passed, as your contract says.
Rules on liens, lien waivers, and payments to suppliers and subcontractors vary by place. Track the dates and the notices your rules require, and check them with someone qualified. Payments happen in your payment tool, and you update the status in Notion when the money arrives. Tax rules differ by country, so check what applies to you. Notion Receipt Template shows how to structure a receipt.
Your Business Numbers
A roofing business has a few numbers worth watching. Here is a made-up quarter.
| Item | Value |
|---|---|
| Estimates sent | 80 |
| Contracts signed | 28 |
| Close rate | 35% |
| Average job | 9,950 |
| Revenue | 278,600 |
| Gross profit at a 35% margin | 97,510 |
| Jobs started on the planned date | 22 of 28 |
| On-time start rate | 79% |
| Jobs with a complete photo set | 26 of 28 |
| Photo compliance | 93% |
| Leak callbacks within the warranty | 2 |
| Callback rate | 7% |
A low close rate may point to slow follow-up, pricing, or weak estimates. A high callback rate points to workmanship or materials, and the photos will show you where to look.
Also watch the margin on each job against the estimate, the time from lead to estimate, the average days from completion to payment, and the share of jobs from each source. A small sample can mislead, so treat these as guides.
They leave out your overhead, insurance, equipment, and tax, so check the full figures with an accountant. Test every formula with made-up numbers and check it with a calculator.
A Wednesday After a Hailstorm
To see how the pieces fit, here is one made-up Wednesday for a company with an owner, an estimator, an office manager, and two crews, the day after a hailstorm.
7:00 am. The office manager opens the Pipeline board. Fourteen new leads came in overnight. She books inspections for the ones with active leaks first, and tells the rest when to expect a visit.
8:00 am. The Weather reschedule view shows two jobs this week with rain forecast on Friday. She moves one job a day earlier, and messages the customer.
9:00 am. The Order flag shows materials for Monday’s job aren’t ordered, with a five-day lead time. She places the order, and updates the status.
11:00 am. A crew lead finishes a tear-off, finds rotted decking, and photographs it. The estimator sends the customer a change order with the photos, and the customer signs.
1:00 pm. The Permit flag shows a job starting Thursday without an approved permit. She calls the permit office, and learns it will be approved tomorrow.
3:00 pm. The Photo flag shows a completed job with only two final photos. She asks the crew lead for the rest before the final invoice goes out.
4:00 pm. The Estimates to follow up view shows six estimates sent three days ago. The estimator calls each one.
5:30 pm. She sets a job’s estimate to Ready to Generate. The PDF goes to the homeowner.
Nothing depended on anyone’s memory.
The Documents That Leave Notion
Customers, crews, and suppliers don’t use your workspace, so some records need to become files:
For a single page, you can use Notion’s export option. How to Export Notion to PDF shows the settings. Homeowners judge a roofer partly by the clarity of its paperwork, and Notion’s own export gives you limited control over layout. How to Add Your Logo and Brand Colors to Notion PDFs explains how a template solves that.
Generating PDFs with PDFOutput
PDFOutput creates documents from your Notion data using a template. A template can be a Google document, a Word file, a PDF file, or a Notion page. If you already have an estimate or job sheet layout in Word or Google Docs, you can reuse it.
Here is how it works:
These are some of the status options:
The e-signed option may help with estimates, contracts, and change orders. Whether an electronic signature is valid for a given document depends on your location and the type of document, and consumer contracts can have specific rules, so check before you rely on it. You can save the finished file to a property in your database, so an estimate stays on the job record. You can also save it to a Google Drive folder and store the link in a property.
Three kinds of document work well.
An estimate uses the fields on one job record: the customer, the address, the squares, the materials, the price, the deposit, and your standard terms.
A job sheet uses the fields on the same record and the crew record: the dates, the crew, the materials, the hazards, and the checklist as text.
A change order uses a short set of fields: the job, what was found, the work, and the price. If you’d like a photo report that lists every photo, test a template with a sample job that has many, and check that each appears. If it doesn’t, write a short summary as text on the job with the photo folder link, and use that in the template.
Before using any document tool with information about your customers, ask the provider how data is handled, where it’s stored, and what agreements are available, and keep the answers with your records. The safest approach is to generate documents from records that hold only what the recipient should see. Never put your costs or margins on a customer’s estimate, or another customer’s details on anyone’s document. Check the name, the address, the scope, and the price on every document before you send it.
Start with the estimate, since it wins the job. Use Preview first and check for empty fields, the right customer and address, and a price and scope you’re happy to be held to.
> 📌 Key Takeaway: Calculate every estimate from squares and a target margin, schedule crews and materials from the install date, and give every job a photo set before, during, and after. Then estimates, job sheets, and photo reports come from records you already have, and the roof is documented before anyone asks.
Who Can See What
Your workspace will hold customer addresses, costs, margins, and photos, so control access tightly.
Common Mistakes
Pricing with a markup. A 35 percent markup is not a 35 percent margin. Divide the cost by one minus the margin.
Measuring the footprint and forgetting the pitch. The slope adds area. Use a pitch factor, or a measurement report.
Forgetting waste. Ordering exactly the squares leaves you short. Add a waste percentage.
Ignoring hidden damage in the estimate. Include a decking allowance, and use change orders.
Starting extra work without a signature. Get the change order signed first, with photos.
Late material orders. Count back from the install date, and use the flag.
Skipping the permit check. An unapproved permit can stop a job on the day.
Thin photo records. Use the checklist and the flag on every job.
Storing all photos in Notion. Keep the originals in cloud storage, and link to them.
Waiving deductibles. Many places forbid it. Check the rules and don’t offer it.
Acting as the adjuster. Know what a contractor may do on a claim where you work.
Letting training and insurance lapse. Use the compliance flag for every crew.
Too many properties. If a job takes an hour to set up, it won’t get done. Keep the templates short.
No owner for the structure. If more than one person edits the workspace, pick one person responsible for the setup. Properties get renamed and formulas break, so tell that person not to rename properties used in PDF templates, because the placeholders must match exactly.
Skipping a test. Run a month with made-up jobs first, and fix what annoys you before you use real records.
Frequently Asked Questions
Can Notion be used to run a roofing business?
For the management side, yes. It can organize customers, jobs, estimates, crews, material orders, photos, and invoices. It isn’t a measuring tool, an accounting system, a payment tool, or a photo archive, so keep the measurements, the money, and the original photos in the tools built for them.
How do I calculate a roofing estimate in Notion?
Multiply the footprint by a pitch factor to get the roof area, divide by 100 for squares, and add a waste percentage for the material order. Multiply the squares by your material and labor costs, add disposal, permits, and a decking allowance, and divide the direct cost by one minus your target margin to get the price.
How do I organize job photos in Notion?
Store the original photos in cloud storage with one folder per job. In a Photos database, record links tagged by stage and area, and use a checklist template to make sure every job has the same minimum set. Use helper formulas and a flag to catch jobs with missing before or final photos.
How do I schedule roofing crews in Notion?
Record each crew’s typical squares per day, link a crew to each job, and use a formula to calculate the production days and the end date from the squares. Use a timeline view grouped by crew to see overlaps, and a weather reschedule view of jobs starting in the next few days.
How do I handle change orders and insurance claims in Notion?
Record hidden problems with photos, send a written change order before doing the extra work, and add the total to the final price. For claim jobs, track the claim status, the approved amount, and any supplements, be clear about your role, and check the rules on deductibles and contractor involvement where you work.
Is it safe to store customer information in Notion?
Notion lets you control who sees each page, but your duties depend on the rules where you work. Collect only what you need, keep card details, insurer logins, and access codes out, store photos in secure storage, limit access to the people who need it, and get permission before you use a customer’s roof in marketing.
Can I create estimates and job sheets from Notion?
You can export a page as a PDF, or use a template-based tool such as PDFOutput to fill an estimate or job sheet template with data from each record. Put the key facts in clearly named properties on one record, have your contract wording reviewed by a qualified person, test it on a few sample records first, and check each document before you send it.
Related Reading
A good roofing setup in Notion keeps the work provable and profitable: an estimate built from squares, waste, and a target margin, crews and materials scheduled from the install date, change orders signed before extra work, and a photo record for every job from the first look to the last sweep of the driveway. Keep safety, insurance claim rules, and customer privacy front of mind, keep the original photos in secure storage, and run a month with made-up jobs first. When your estimates, job sheets, and photo reports need to leave Notion, PDFOutput can fill your template from each record and save the PDF to your chosen storage.
Want estimates and job sheets as clean PDFs? Try PDFOutput.