Guides
How to Automate Delivery Notes and Packing Slips in Notion
Learn how to automate delivery notes and packing slips in Notion with orders, shipment lines, backorders, pre-flight checks, and PDF templates that fill themselves from each shipment.
By Sanat Biswal · 2026-11-07 · 5 min read
{/ synced-from-notion — do not edit manually /}
Every shipment needs a piece of paper.
A packing slip goes in the box so the customer can check what arrived. A delivery note travels with the goods so someone can sign for them. Both are simple documents, and in a small business they are usually typed by hand: open last week’s file, change the customer, retype the items, fix the quantities, save a PDF, attach it, and hope nothing was copied over from the previous order.
Done for 10 times a week it’s annoying. Done 60 times it’s an hour of typing a day, and a steady supply of wrong quantities, old addresses, and slips that never made it into the box.
Notion can hold the data these documents are made from, and a template-based tool can turn each shipment record into a finished PDF. This guide shows how to build that chain.
It covers the six databases that make it work, how to handle partial shipments and backorders, how to build the list of items for the document, how to stop a document from being generated with missing details, how to design the templates, and how to trigger generation with a status change or a button.
It also covers proof of delivery, testing, troubleshooting, and privacy. It is general information about organizing a process, not legal, customs, or logistics advice.
Short answer on how to Use Notion for delivery notes:
To automate delivery notes and packing slips in Notion, keep one record per order and one per line, one record per shipment and one per shipment line.
Record exactly what’s in each shipment, with quantities, cartons, carrier, and the delivery address copied onto the shipment. Use a formula to build a plain-text list of the shipped items, and another to check that the required details are present. Design a delivery note template and a packing slip template with placeholders that match your property names. Then set a status or press a button, and PDFOutput fills the template and saves the PDF to the shipment record. Check the first documents carefully, and test with awkward cases before you rely on it.
The trick is to treat the document as a view of the data. The shipment record already knows the customer, the address, the items, and the quantities, so the PDF just presents them.
A relation links each shipment line to its order line, a rollup adds up the quantities, and a formula joins the lines into text. Notion isn’t a warehouse management system, a shipping label tool, or a customs system. It doesn’t print labels, track parcels, or produce legal shipping documents by itself, and it doesn’t send the PDF anywhere on its own.
It works best as the record behind your shipping process, beside your carrier’s tools, your inventory or e-commerce system, and your email.
Table of Contents
Delivery Notes, Packing Slips, and What They’re Not
The names overlap, and the same business may use them differently, so agree on what each means for you.
| Document | Purpose | Usually includes | Usually leaves out |
|---|---|---|---|
| Packing slip | Goes in the box, so the receiver can check the contents | Order and shipment numbers, ship-to, items, quantities, cartons, backorders | Prices, in many cases |
| Delivery note | Travels with the goods, and confirms what was delivered | Delivery number, date, parties, items, quantities, carrier, a signature block | Prices, in many cases |
| Invoice | A request for payment | Prices, taxes, totals, payment terms | The signature block |
| Bill of lading and carrier documents | The carrier’s contract and receipt for the goods | Issued by or with the carrier | Not something to create from a template |
| Customs documents | Needed to export or import goods | Specific legally required content | Not something a packing slip replaces |
If you do, make sure it still serves both jobs: a clear list for checking the contents, and a place to confirm receipt. For international shipments, the carrier or a customs broker will tell you which additional documents are required, and a packing slip supports them but doesn’t replace them.
What Notion Can and Can’t Automate
Notion and a template-based tool can automate:
- Pulling the customer, address, items, and quantities into a document.
- Numbering documents consistently.
- Checking that required details are present.
- Calculating totals, backorders, and carton counts.
- Generating a PDF from a status change or a button.
- Saving the PDF on the shipment record.
- Print shipping labels or book a carrier.
- Track a parcel, or confirm that it arrived.
- Manage stock levels across channels.
- Produce customs or dangerous goods paperwork.
- Email the document, unless you connect another tool.
- Make the data right, which is still your job.
- Customers stores who you ship to. Add: Name, Company, Email, Phone, Billing Address, Default Shipping Address, and Delivery Instructions. Keep personal data to what you need.
- Products stores what you ship. Add: SKU, Product Name, Description, Unit (Each, Box, Pallet, or Kg), Weight, Barcode Reference, and Active (a checkbox).
- Orders stores each customer order. Add: Order Number (a unique ID with a prefix, such as SO), Customer (relation), Customer PO Number, Order Date, Status (Received, Picking, Partly Shipped, Shipped, Delivered, or Closed), Ship-To Name, Ship-To Address, Ship-To Phone, Delivery Instructions, Total Ordered (a rollup), Total Shipped (a rollup), and Backordered (a formula).
- Order Lines stores each line on an order. Add: Order (relation), Product (relation), SKU (a rollup), Description (a rollup), Qty Ordered, Qty Shipped (a rollup), Backordered (a formula), and Over-Shipped Flag (a formula).
- Shipments stores each box, parcel, or pallet movement. Add: Shipment Number (a unique ID with a prefix, such as DN), Order (relation), Ship Date, Carrier, Service, Tracking Number, Cartons, Weight, Ship-To Name, Ship-To Address, Ship-To Phone, Delivery Instructions, Status (Draft, Picking, Packed, Ready to Generate, Shipped, Delivered, or Exception), Items Text (a formula), Total Units (a rollup), Line Count (a rollup), Ready Check (a formula), Packing Slip PDF, Delivery Note PDF, and Signed Copy.
- Shipment Lines stores what’s in each shipment. Add: Shipment (relation), Order Line (relation), Product Name (a rollup), SKU (a rollup), Qty Shipped, Packed By, Checked By, and Notes.
- To ship: orders with the status Received or Partly Shipped, sorted by date.
- Backorders: orders where Backordered is above zero, so nothing is forgotten.
- By customer: all orders for one customer, for questions.
- To pack: shipments with the status Draft or Picking.
- Ready to generate: shipments with the status Ready to Generate.
- In transit: shipments that have shipped and not yet been delivered, with tracking numbers.
- Exceptions: shipments with the status Exception, such as damage, shortage, or a failed delivery.
- Your logo, name, address, and contact details
- The title “Packing Slip”
- The shipment number, the order number, the customer’s PO number, and the ship date
- The ship-to block, and the bill-to if it differs
- The carrier, the service, the tracking number, the number of cartons, and the weight
- The item list, with SKUs, descriptions, and quantities shipped
- Backordered items, if any, clearly marked
- Total units
- A short note: how to check the contents, how to report a problem and by when, and how to start a return
- No prices, unless your customers want them
- The title “Delivery Note” and a delivery note number
- The delivery address and instructions
- A statement that the goods were received in good condition, or with the exceptions noted
- A signature block: the name, the signature, the date, and a space for notes on damage or shortages
- Create your template with your name, your logo, and your layout.
- Add placeholders in double curly braces where the data should go.
- Make sure each placeholder matches the name of a Notion property.
- Start the document with a Notion database button or a status property.
- Ready to Generate creates a PDF from the database record.
- Generate Page converts the Notion page into a PDF.
- Generate PDF and Doc creates a PDF and a Google document.
- Preview creates a Google document so you can check it before making the final PDF.
- Generate E-Signed Doc creates an e-signed PDF in the database workflow.
- Draft: the shipment exists, and lines are being added
- Picking: items are being collected
- Packed: everything is in the cartons, and counts are entered
- Ready to Generate: the check is OK, and the documents can be created
- Shipped: the carrier has collected the goods
- Delivered: delivery is confirmed
- Exception: something went wrong, and needs action
- A paper signature. The driver or the customer signs a printed delivery note, and you scan or photograph it, then attach it to the shipment’s Signed Copy property.
- The carrier’s electronic proof of delivery. Many carriers provide a signature, a photo, and a time stamp online. Record the tracking number, and save or link the proof.
- An e-signed document. The e-signed status can create a signable PDF in the database workflow. Whether an electronic signature is valid for a delivery receipt depends on your location, your customer, and the type of document, so check before you rely on it.
- A photo. For unattended deliveries, a photo of the parcel at the door, with the time, may be accepted under your terms.
- One line, one carton
- Forty lines on one shipment
- A very long product name and a very long address
- A partial shipment with a backorder
- Names with accents and special characters
- A shipment with no tracking number
- A blank delivery instruction
- An over-shipped line, to see that the flag works
- A shipment with a missing address, to see that the check stops it
- Addresses and phone numbers are personal data. Collect only what you need, keep them to the people who need them, and follow your retention rules. A recipient’s mobile number on a packing slip may be seen by anyone who handles the box.
- Don’t print prices where you shouldn’t. For gifts, drop shipments, and resellers, a packing slip with your prices can reveal your margins or your pricing to the end customer. Use a price-free template.
- Keep internal costs out of templates. A template should only show fields the recipient should see.
- Never store carrier or marketplace logins in Notion. Use a password manager.
- Know what documents the shipment needs. Export, import, dangerous goods, temperature-controlled goods, and restricted products need documents that a packing slip doesn’t replace. Ask your carrier or a customs broker.
- Check the document tool. Ask the provider how data is handled, where it’s stored, and what agreements are available, and keep the answers with your records.
- Keep records as your rules require. Delivery and tax records often need to be kept for years, in a specific form. Find out what applies to you, and keep the originals in the right place.
- Check electronic signatures. Their validity depends on where you are and what the document is, so check before you rely on them.
- How to Use Notion for a Roofing Business
- How to Use Notion for a Catering Business
- How to Use Notion for a Fashion Brand
- Notion Receipt Template
They can’t, on their own:
If you already use an e-commerce platform, an inventory tool, and carrier software, decide which one is the source of truth for orders and stock.
Notion can hold a copy of the order for the paperwork, or it can be where orders are entered by hand. Avoid keeping the same data in two places and editing both.
Use These 6 Databases
You need 6 small databases. If you already have some of them, adapt the names.
A relation connects a record in one database to a record in another. Link Orders to Customers, Order Lines to Orders and Products, Shipments to Orders, and Shipment Lines to Shipments and Order Lines.
Now a shipment’s page shows what’s in it, and an order’s page shows what has shipped and what hasn’t.
Orders and Order Lines
Record each order the same way, whether it arrives by email, a portal, or an e-commerce export.
Create an Order with the customer, the customer’s PO number, and the date. Copy the shipping address onto the order as text, rather than only linking to the customer. Addresses change, and a delivery note from last year should show the address used last year. The same goes for the delivery instructions and the phone number.
Then create an Order Line for each product, with the product and the quantity ordered. On Order Lines, roll up the Qty Shipped from Shipment Lines (a sum), and add:
``
Backordered: max(0, prop("Qty Ordered") - prop("Qty Shipped"))
Over-Shipped Flag: if(prop("Qty Shipped") > prop("Qty Ordered"), "Over-shipped", "")
`
On Orders, roll up the ordered and shipped quantities, and add:
`
Backordered: prop("Total Ordered") - prop("Total Shipped")
`
Make these views of Orders:
Use a unique ID property for the order number, with a prefix. It numbers each new record for you, so no two orders share a number. Check how the numbers are formatted, since the ID property doesn’t pad with zeros.
Shipments and Shipment Lines: Partial Deliveries and Backorders
A shipment is what actually goes out the door. It can be a whole order, or only part of one. Recording it separately is what makes partial deliveries and backorders work.
When you pick an order, create a Shipment linked to it. Copy the order’s ship-to details onto the shipment, since that’s what the carrier and the document will use. Then, for each product you’re sending, create a Shipment Line linked to the shipment and to the order line, with the quantity shipped.
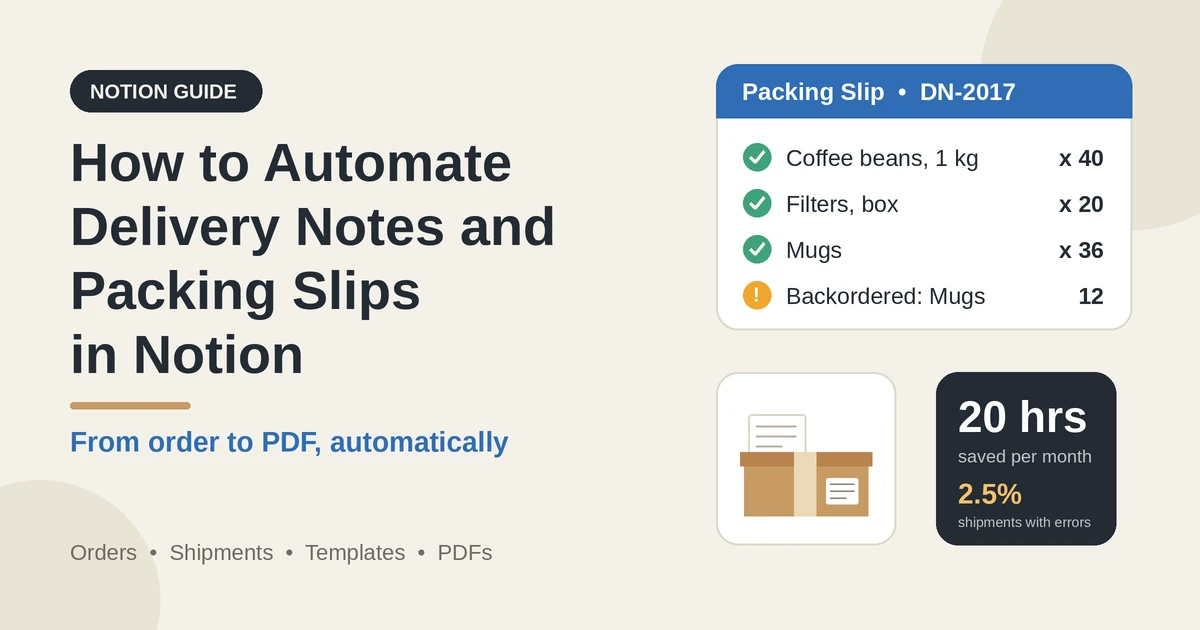
Here is a made-up order, SO-1042, for 3 products. Not everything is in stock, so the first shipment is partial.
| Product | Ordered | Shipped in DN-2017 | Backordered |
|---|---|---|---|
| Coffee beans, 1 kg | 40 | 40 | 0 |
| Filters, box | 20 | 20 | 0 |
| Mugs | 48 | 36 | 12 |
| Total units | 108 | 96 | 12 |
On Shipments, roll up the sum of the quantities as Total Units, and the count of lines as Line Count. Keep the carrier, the service, and the tracking number as plain properties. Record the cartons and the weight too, since carriers and receivers both use them.
Make these views of Shipments:
Build the Item List for the Document
The document needs a list of items, and that’s the hardest part to automate, because a list of related records doesn’t always carry across into a template. A reliable workaround is to build the list as plain text, in a formula, on the shipment.
Notion formulas can read properties from related pages, using map and join. On Shipments, add:
`
Items Text: prop("Shipment Lines").map(current.prop("SKU") + " " + current.prop("Product Name") + " x " + format(current.prop("Qty Shipped"))).join("\n")
`
For the example above, the result is one line per product, such as the SKU, the product name, and the quantity shipped, separated by line breaks. In the template, a single placeholder, {{Items_Text}}, will bring in the whole list.
If you’d like to show the backordered quantity as well, add it to the Shipment Lines through a rollup from the order line, then include it in the text:
`
Items Text: prop("Shipment Lines").map(current.prop("SKU") + " " + current.prop("Product Name") + " shipped " + format(current.prop("Qty Shipped")) + " backordered " + format(current.prop("Backordered"))).join("\n")
`
Keep the text simple. Fixed-width alignment isn’t reliable in most templates, so use separators such as spacing or a dash between the items, and don’t rely on columns lining up.
If you need a true table with columns, test whether your template tool can list related records, and if it can’t, consider a fixed set of line slots on the shipment, such as Item 1 to Item 10, each filled by a formula from the lines.
A slot approach is rigid, but it gives you neat columns for shipments with a known maximum number of lines.
Add two more simple fields that documents commonly need:
`
Ship-To Block: prop("Ship-To Name") + "\n" + prop("Ship-To Address") + "\n" + prop("Ship-To Phone")
`
It puts the name, the address, and the phone number into one block with line breaks.
Check the Record Before You Generate
A document built from incomplete data is worse than no document. A pre-flight check on the shipment catches the problem before the PDF exists.
On Shipments, add:
`
Ready Check: if(and(prop("Ship-To Name") != "", prop("Ship-To Address") != "", prop("Carrier") != "", prop("Cartons") > 0, prop("Line Count") > 0, prop("Total Units") > 0), "OK", "Missing details")
`
The formula shows OK only when the key details are present: the name, the address, the carrier, the number of cartons, and at least one line with a quantity. Add other checks that matter to you, such as a tracking number for carriers that provide one, or a weight for freight.
Make a view called Fix before generating, with every shipment that has the status Ready to Generate and a check other than OK. Only shipments with OK should be generated. Teach the team to look at the check first, and it will prevent most bad documents.
Add a second check for the quantities, so a wrong total doesn’t go out:
`
Quantity Flag: if(prop("Total Units") == prop("Packed Units Count"), "", "Check packed total")
`
For this, add a number property, such as Packed Units Count, where the packer enters the total units they actually packed. The flag appears if it differs from the sum of the lines. It’s a simple, human double-check, and catches a surprising number of errors.
Design the Templates
You need two templates: a packing slip and a delivery note. They can be Google Docs, Word files, PDFs, or Notion pages. Start from a layout you already like, and add the placeholders.
A good packing slip has:
A good delivery note has the same core details, plus:
Placeholders go in double curly braces and must match the property names, with underscores in place of spaces, such as {{Shipment_Number}}, {{Order_Number}}, {{Ship_Date}}, {{Ship_To_Block}}, {{Carrier}}, {{Tracking_Number}}, {{Cartons}}, {{Items_Text}}, and {{Total_Units}}. Check how your tool expects the names to be written, and keep the property names stable, because renaming one in Notion breaks its placeholder.
Design for the worst case, and not the average one. A one-line order and a 40-line order should both fit the page, a long address should wrap neatly, and a long product name shouldn’t push the quantity off the edge. Leave enough room for the item list, and use a font size that stays readable when printed.
Generate the PDFs with PDFOutput
PDFOutput creates documents from your Notion data using a template. A template can be a Google document, a Word file, a PDF file, or a Notion page. Here is how it works:
These are some of the status options:
You can save the finished file to a property in your database, so the packing slip and the delivery note stay on the shipment record. You can also save it to a Google Drive folder and store the link in a property.
Before relying on it, check how PDFOutput maps a template to a button or a status in your setup. The simplest arrangement is one template for each type of document, each with its own button or its own status value, such as “Generate Packing Slip” and “Generate Delivery Note.”
Confirm in the product’s current documentation what’s supported, because options and limits can change.
Start with Preview. It creates a Google document that you can read and check before you make the final PDF. When you’re happy with the template, use the status or the button that makes the PDF directly.
Trigger Generation From a Status or a Button
The less people have to remember, the fewer documents get missed. There are three ways to trigger generation, from simplest to most automatic.
A button on the shipment. Add a Notion button property to Shipments that sets the status to Ready to Generate, or the status your template tool listens for. The packer presses it when the shipment is packed and the check shows OK. It’s one click, and it’s visible.
A status change. Move the shipment through its statuses, such as Draft, Picking, Packed, and Ready to Generate. Setting the last one triggers the document.
A database automation. Notion database automations can run when a property changes, for example, when a shipment’s status becomes Packed, and then edit another property, such as setting the document status to Ready to Generate. That chains the steps together, so packing a shipment produces its documents without another click. Check whether automations are available on your plan, and test them carefully. Use the check as a condition, so documents aren’t generated for incomplete shipments.
After the PDF is created, you still need to get it to the right place. Notion doesn’t email it for you, so print the packing slip and put it in the box, attach the delivery note to the shipment, and send any customer copy using your email or a connected tool. A common routine is to print both on a shared printer at the packing station.
Keep the status flow simple, so everyone knows what each status means:
Proof of Delivery
A delivery note is only useful as evidence if it’s confirmed by the receiver. How you capture that depends on your carrier and your customers.
Options include:
Record the date and time of delivery and who received it, as the carrier reports. Keep the proof for as long as your terms and your rules say, since claims for missing or damaged goods often arrive weeks later. Use the Exception status for shortages and damage, with a short note and a photo, and link the exception to the customer’s complaint and your carrier claim.
State clearly on the delivery note how the receiver should report damage or a shortage, and by when. Many terms require a note on the delivery receipt at the time, and a short deadline for hidden damage. Check what your terms and the carrier’s terms require.
Test With Awkward Cases
A template that works for one tidy shipment isn’t tested. Before you use it for real, build a handful of made-up shipments that stress it:
For each, generate a Preview, and check the results against the data. Print one and look at it on paper, because screens hide problems with margins and font sizes. Ask someone who has never seen the template to read the packing slip and tell you what’s in the box. If they can’t, fix the layout.
Keep a short log of your tests, and repeat the important ones each time you change a property, a formula, or a template.
Troubleshooting
A few problems come up again and again.
A placeholder shows up in the PDF, or the field is blank. The placeholder doesn’t exactly match the property name, or the property is empty. Check spelling, capitals, and spaces, and make sure the data is in the record.
The item list is missing or in one long line. Check the formula first, then whether line breaks survive in your template. If they don’t, use separators such as a dash or a pipe instead, or switch to the slot approach.
The totals are wrong. The rollup may be counting the wrong lines, or you’ve edited the lines after generating. Regenerate after any change, and use the quantity flag.
The address looks different from what the customer expects. Check whether the ship-to text on the shipment was copied from an older order or the customer’s default address.
A document is generated for an incomplete shipment. Add the ready check to your automation condition, or train the team to only use the button when the check is OK.
Renaming a property broke a template. Placeholders must match. Keep one person in charge of the structure, and don’t rename properties that templates use.
The PDF lands in the wrong place. Check the destination property or folder, and the permissions on the folder.
Dates look wrong. Check the date format and the time zone settings, and use a formula with formatDate` to produce a text date in the format you want.
Privacy and Compliance
Delivery paperwork carries personal and commercial information, so a few cautions apply.
Rules differ by country and industry, so check what applies to you. While you are testing, use made-up customers, addresses, and products.
Measure What You Saved
Automation should save time and reduce mistakes, so measure both. Here is a made-up month.
| Item | Value |
|---|---|
| Shipments | 240 |
| Time to make a document by hand | 6 minutes |
| Time with automation, including the check | 1 minute |
| Minutes saved per shipment | 5 |
| Hours saved per month | 20 (240 × 5 ÷ 60) |
| Shipments with a pick or quantity error | 6 |
| Error rate | 2.5% |
| Shipments that failed the ready check and were fixed first | 14 |
Also watch the time from “Packed” to “Shipped,” the number of backorders and how long they last, the exception rate by carrier, and how many customers contact you with questions about a delivery. A small sample can mislead, so treat these as guides. Test every formula with made-up numbers and check it with a calculator.
Common Mistakes
Typing documents by hand. It’s slow and it’s where most errors begin.
Linking only to the customer’s address. Copy the address onto the order and the shipment, so old documents don’t change.
Combining orders and shipments. Partial deliveries and backorders need a separate shipment record.
Skipping the ready check. Generating from incomplete data produces bad documents quickly.
Putting prices on every slip. Use a price-free version where it matters.
Relying on a list that doesn’t render. Test how the items appear before you trust it, and have a fallback.
Editing records after generating. Regenerate the document, and use a status that shows it.
Renaming properties. It breaks the placeholders. Keep one owner for the structure.
Not testing on paper. Margins, fonts, and long lines show up in print.
Forgetting proof of delivery. Decide how you’ll capture and keep it, before a dispute.
Assuming a packing slip covers customs. It doesn’t. Ask your carrier or broker.
Storing logins and sensitive data. Keep them out of Notion.
No fallback. Know what you’ll do if a template or an automation fails on a busy day.
Skipping a test. Run a week of made-up shipments first, and fix what annoys you before you use real records.
Frequently Asked Questions
Can Notion automatically create delivery notes and packing slips?
Notion holds the data, and a template-based tool such as PDFOutput fills a template from each record and creates a PDF when a button or a status triggers it. Notion alone can’t produce a formatted PDF from a template, and it doesn’t send the document anywhere, so the full flow uses both.
What’s the difference between a packing slip and a delivery note?
A packing slip goes in the box, so the receiver can check the contents. A delivery note travels with the goods, and confirms what was delivered, often with a signature. Many businesses use one document for both, as long as it does both jobs.
How do I list the items in a shipment on the PDF?
Build the list as text with a formula on the shipment, joining the SKU, the product name, and the quantity of each shipment line with line breaks, and use one placeholder for it. Test how it looks in your template, and fall back to separators or a fixed set of line slots if line breaks don’t carry through.
How do I handle partial shipments and backorders?
Keep orders and shipments in separate databases, with lines under each. Each shipment line records the quantity shipped against an order line, a rollup adds up everything shipped, and a formula subtracts it from the quantity ordered to show what’s backordered.
How do I stop a document being generated with missing details?
Add a ready check formula that tests the required properties, such as the address, the carrier, the number of cartons, and the lines, and only trigger generation when it reads OK. Make a view that shows shipments that need fixing first.
Should a packing slip show prices?
Often not. For gifts, drop shipments, and resellers, prices can reveal your margins or pricing to the end customer. Keep a price-free template, and use a separate document, such as an invoice, for the prices.
How do I capture a signature on a delivery note?
Options include a signed paper copy that you scan or photograph, the carrier’s electronic proof of delivery, an e-signed document, or a delivery photo, depending on your terms. Whether an electronic signature is valid depends on your location and the document, so check before you rely on one.
Related Reading
Automating delivery notes and packing slips in Notion comes down to getting the data right once. Record orders and lines, record each shipment and its lines separately so partial deliveries and backorders work, copy the address onto the shipment, build the item list with a formula, and check the record before you generate. Then design two templates, link them to a button or a status, and let PDFOutput fill them from each shipment and save the PDFs on the record.
Keep prices and personal details to what each recipient should see, decide how you’ll capture proof of delivery, test with awkward cases and on paper, and run a week of made-up shipments first. When it works, a packed shipment becomes a packing slip and a delivery note in a click, and the typing, and most of the mistakes, are gone.
Want packing slips and delivery notes as clean PDFs? Try PDFOutput.