Compare
How to Do a Google Docs Mail Merge
Set up a Google Docs mail merge with Google Sheets, add-ons, or Apps Script, then generate personalized files or automate PDFs from Notion.
By Sanat Biswal · 2026-11-06 · 9 min read
{/ synced-from-notion — do not edit manually /}
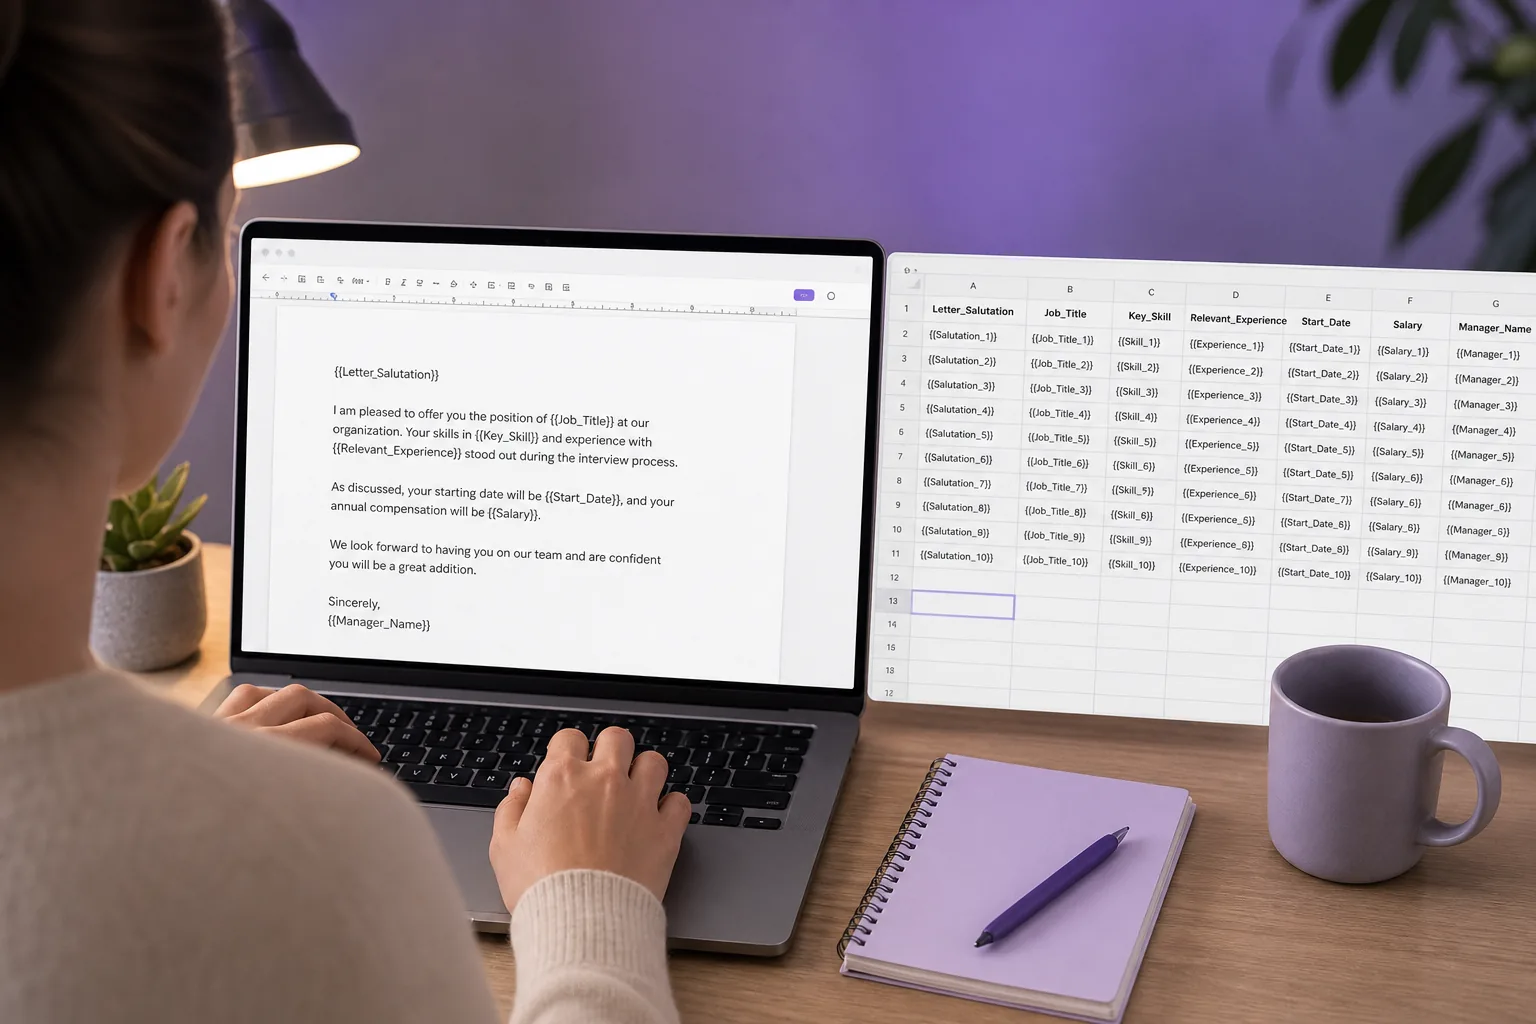
A Google Docs mail merge turns rows of data into personalized documents, so you don’t have to edit each copy by hand. Start with a clean Google Sheet, match its column names to placeholders in a template, then test one record before making a batch. If your records already live in Notion, you can also automate document creation there.
Step 1: Prepare Your Mail Merge Data
Set up your data before you build the document. For a Google Docs workflow, use a Google Sheet as the source. Put one record in each row, with a clear field name in the first row of every column.
For example, an offer letter sheet might have columns for First Name, Role, Start Date, and Salary. Each row holds one person’s details. Keep each value in the right column, and remove blank rows that could be mistaken for records.
Use simple, consistent header names. If you use First_Name in the sheet, use the same spelling in the document placeholder. A space, underscore, or capital letter difference can stop the field from matching.
- Check that each record has the details the document needs.
- Use a test row with realistic values, including long names or amounts if those occur in your data.
- Keep a separate column for a choice such as “Send?” if you need to select which rows to process.
- Open the merge add-on from the Google Sheet or Docs menu it provides.
- Select the right spreadsheet tab and choose the template document.
- Map each sheet column to its matching placeholder.
- Choose whether to create individual Google Docs, PDFs, or another supported format.
- Run a preview or merge one test row first.
- Ready to Generate: generates a PDF.
- Generate Page: converts a Notion page to PDF.
- Generate PDF and Doc: creates a PDF and Google Document.
- Generate E-Signed Doc: creates an e-signed PDF in the database.
- Preview: creates a Google Document preview before the final PDF.
Review the sheet for duplicate rows and mismatched names before you merge. If you’re making business documents from Notion instead, this overview of mail merge software for Notion PDFs explains how database properties can feed reusable templates.
That small review matters. A row with the wrong email address can send a correct document to the wrong person.
> 💡 Pro Tip: Make a copy of your source sheet before a large merge. Use the copy to test the merge, then run the final batch from your checked source sheet.
Step 2: Create a Google Docs Mail Merge Template
Write the document once, then mark the spots that should change for each record. In Google Docs, use placeholder tags that match the sheet’s column headers. For example: “Hello \{\{First_Name\}\}” or “Your start date is \{\{Start_Date\}\}.”
Keep the fixed text in the template and use placeholders only for changing values. This works for letters, quotes, invoices, certificates, and similar files. Check that every tag has a matching column in the sheet before moving on.
A basic mail-merge pattern is to copy a template and insert values from a data source into each copy. The same approach can be used for documents such as customer invoices.
To run a no-code merge, install a suitable mail-merge add-on from the Google Workspace Marketplace. Open the Marketplace, search for a document merge tool, review its permissions and features, then install it with the Google account that can access your sheet and template. Add-ons differ, so follow the setup steps shown by the one you choose.
Before you apply a style, test the tags with sample data. A preview can show whether long names wrap well or a date lands in the right place. It can also catch a missing field before it appears in every file.
Keep the design easy to scan. Use a clear heading for the document title, leave room for variable text, and check page breaks with the longest likely values.
Step 3: Connect Your Data and Generate Merged Documents
Connect the template to the Sheet through your add-on. The exact menu names vary, but most workflows ask you to choose the source sheet, match its columns to template fields, and pick an output format or destination.
Open the test output and compare it with the source row. Check the person’s name, dates, amounts, spacing, and page breaks. If the document is right, process the records you need. Choose PDF when recipients need a fixed copy for signing, printing, or filing. Keep an editable document when a reviewer still needs to make changes.
Some workflows also let you send a merged email through Gmail or create drafts for review. If email delivery is part of the job, check the recipient field and attached file on a test message before sending. For Gmail’s built-in mail merge, Google says the recipient details must be in the first spreadsheet tab and stored as text. Eligible accounts also have daily sending limits, so check Google’s Gmail mail merge guidance before planning a large send.
For a repeat document workflow, keep the template and source data in clear folders. Name output files with useful fields, such as a client or invoice number, if your add-on supports that option.
If you’re weighing templates and source-data options, this guide to document template software for Notion covers the same placeholder approach for database-driven documents.
Step 4: Automate Document Generation from a Notion Database
A Google Sheets merge works well when the data is already in Sheets. But if your team tracks client work, orders, or cases in Notion, copying records into a second system adds another task. PDFOutput connects a Notion database to a template and replaces matching placeholders with each record’s values.
Start by checking that your Notion database has the fields the document needs. A simple invoice might use Invoice_No, Client_Name, and Invoice_Amount. Put matching tags such as {{Invoice_No}} in a Google Doc, Word file, PDF, or Notion page template.
Connect the database and choose the template in PDFOutput. Map the fields, then preview a record before setting the workflow live. PDFOutput can generate PDFs, Google Docs, and PPTX files. It also supports batch generation, plus related database values through Notion relations and rollups. A relation links records; a rollup brings selected information from linked records into the main record.
That setup suits recurring documents. An office team could generate a quote from a sales record, while a school could make a certificate from a course entry. One template stays in place while the record data changes.
We built PDFOutput for Notion-based document workflows. It supports monthly or annual subscription plans, and generated files can be stored in Google Drive. For a closer look at the database-to-document setup, see this guide to document automation software for Notion.
Once the template and field map work, you can use bulk generation for a group of records. That cuts out the repeated work of opening a blank document for each row.
Step 5: Set Notion Triggers, Test the Output, and Fix Common Issues
Choose a trigger that fits how your team handles records. PDFOutput can start generation from a Notion database button or from a status property. A staff member can press the button when a record is ready, or update the status to start the chosen action. Scheduled triggers can also suit a workflow that runs at set times.
PDFOutput uses the GeneratePDF property for several actions:
When a placeholder stays empty, compare its spelling with the Notion property name. Check spaces, capitalization, and underscores. If related line items are missing, confirm that the linked database is connected and that its relation is set up as intended.

If the layout shifts, simplify the template and preview it again. Complex formatting can behave differently when a document becomes a PDF. For email merges, use a test message or draft first, confirm every recipient and attachment, and check Gmail’s sending limits before a large send.
> 📌 Key Takeaway: Test the record, the finished file, and the trigger before you let a team rely on the automation.
FAQ
Can Google Docs do a mail merge?
Yes, you can make merged documents with a Google Docs template and a data source such as Google Sheets. Use a mail-merge add-on or build a custom workflow with automation tools. Add placeholders to the template, match them to the sheet’s column names, and test one record before you generate a batch.
How do I send a Google Docs mail merge as a PDF?
Choose PDF as the output format in your mail-merge add-on, if it supports that option. Generate a test file and check its layout before processing the full set. If you plan to email each PDF, confirm that the right file is attached to the right recipient before sending.
Can I send a mail merge through Gmail?
Yes, Gmail has a built-in mail merge feature for eligible Google Workspace accounts. It uses recipient data from a spreadsheet and supports merge fields in the email. Keep contact details in the first tab, check the required text format, and review Gmail’s sending limits before you send a large group.
Can I generate PDFs from a Notion database instead of Google Sheets?
Yes. PDFOutput connects a Notion database to a template and fills placeholders with matching property values. You can use a Google Doc, another supported document format, PDF, or Notion page as the template. The workflow can also use a button or a status property to start generation from the database.
Why are my mail merge fields blank?
Blank fields often mean the placeholder doesn’t exactly match a source column or database property. Check spelling, spaces, capitalization, and underscores on both sides. Also confirm that the record has a value in that field. Run another preview after you fix the mismatch, before processing the rest of the records.
Conclusion
For one-off document batches, a Google Sheet and Docs template can do the job. If your team already manages its records in Notion, set up a matching template and trigger generation from the database with PDFOutput. Start with one record, review the file, then run a small batch.